Why a Code Editor?
Writing code in a basic text editor—like Notepad or TextEdit—is like trying to paint a masterpiece with a toothbrush. It’s technically possible, but it’s miserable. To actually enjoy the process, I use a dedicated code editor.
I chose VSCodium because it’s the community-driven, open-source version of VS Code. I get all the professional-grade features—syntax highlighting that makes code readable and smart auto-completion—but without the telemetry and tracking.
Where to find it
👉 The newest release of VSCodium
I always head straight to the GitHub releases page for the most up-to-date version.
GitHub can be a bit overwhelming because it lists every single build available. The trick is to ignore the noise and find the specific file that matches the hardware I’m currently using. (If you’re looking at that list and it feels like a wall of gibberish, feel free to leave a comment and I’ll point you to the right one).
How I handle the install (across my machines)
Since I jump between Linux and macOS, my installation process varies depending on which machine I’m on:
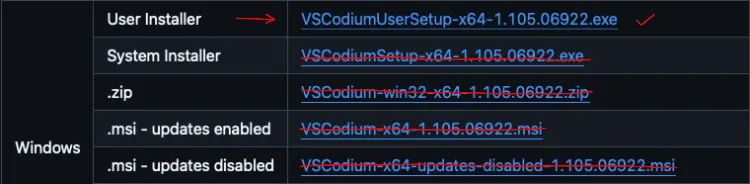
Windows users have two ways of doing this. For a standard install, just grab the
.exeor.msi(usually labeledwin32-x64) and run it.
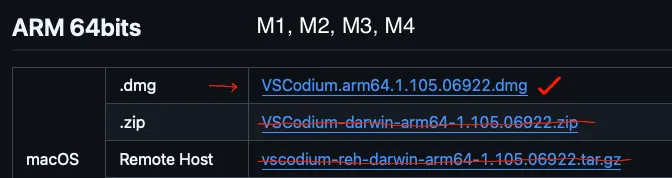
On macOS The process depends on the chip inside the Mac.
- For my Mac Stduio M4 Max, I grab the ARM64 build.
- For older Intel Macs, stick with the x64 build.
Once the download is finished, it’s just a matter of dragging the VSCodium icon into the Applications folder.
On Linux (My daily driver: MX Linux)
Linux is where I have the most flexibility. I grab the .deb package from GitHub and install it via the terminal using: sudo apt install ./file.deb.
Moving Forward
Once the editor is installed and open, I don’t bother trying to memorize every button or menu. That’s a waste of time. The editor is to start using it.
My process is simple: I open my dev foldler and pick a piece of code that looks interesting, and start tinkering. That’s where the real learning begins.