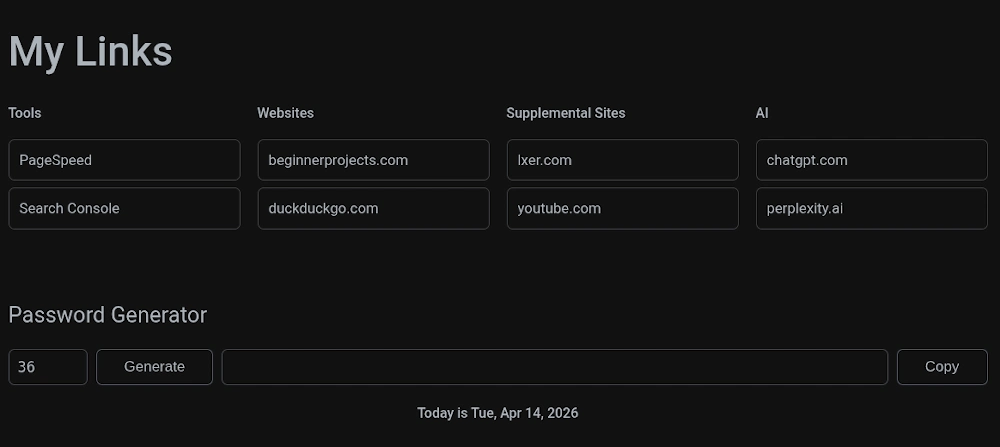
I spend a lot of time every day typing the same website addresses into my browser. Even worse, I have a hard time coming up with secure passwords. So, I solved this problem with a handy app I call “Dashboard”.
The goal is simple: turn “typing a domain name” into “clicking a single button.” Instead of hunting through bookmarks or remembering complex URLs, I use one single local HTML file on my desktop that acts as my mission control, giving me instant access to everything I need to start my workday.
Note: This is a standalone “Single-File App.” All the code, instructions, and security steps required to successfully run this software are contained within this post.
IMPORTANT: Security First (The AI Safety Check)
I want you to verify this software before you run it.
Even though I have provided this for free, it is a best practice to always verify code from the internet.
Before you save the code provided below, please do the following:
- Copy the code from the block at the bottom of this post.
- Open one of these AI tools:
- Paste the code and ask: “Can you check this HTML/JavaScript code for any security issues, vulnerabilities, or viruses?”
In a few seconds, the AI will confirm that the code is safe. Once you have that peace of mind, you are ready to go!
How to Set Up Your Dashboard App
- Save the code to your desktop. I suggest naming the file dashboard.html.
- Pro Tip: If you plan on downloading more free tools from Beginner Projects, create a folder on your desktop called myApps and save your files there to keep things organized.
- Launch the App
Simply double-click the dashboard.html file. It will open instantly in your web browser. For instructions on how to customize the buttons with your own links, read the companion blog post: How I Built My Personal Dashboard (and How to Tweak It)
<!DOCTYPE html>
<html lang="en">
<head>
  <meta charset="UTF-8" />
  <title>Free Dashboard</title>
  <meta name="viewport" content="width=1280" />
  <style>
    :root {
      --bg-main: #121212;
      --bg-surface: #34373F;
      --text-primary: #abb2ba;
      --text-secondary: #abb2ba;
      --accent-primary: #4169E1;
      --accent-secondary: #45B52D;
      --border-subtle: #40444C;
      --border-radius: 7px;
      --spacing-unit: 20px;
      --font-sans: Inter, system-ui, sans-serif;
      --font-mono: Fira Code, monospace;
    }

    body {
      background-color: var(--bg-main);
      color: var(--text-primary);
      font-family: var(--font-sans);
      margin: 0;
      padding: 0;
      font-size: 1.0625rem;
      line-height: 1.6;
    }

    .dashboard-container {
      max-width: 1140px;
      margin: 0 auto;
      padding: calc(var(--spacing-unit) * 1.5) var(--spacing-unit);
    }

    .section-spacer {
      height: 40px;
      width: 100%;
    }

    h1.main-title {
      font-size: 48px;
      font-weight: 500;
      margin-bottom: 20px;
      color: var(--text-primary);
      text-align: left;
    }

    h2 {
      font-size: 1.6rem;
      font-weight: normal;
      margin-bottom: 20px;
      color: var(--text-primary);
    }

    footer p {
      font-size: 1rem;
      font-weight: 500;
      color: var(--text-primary);
      margin-top: 20px;
      text-align: center;
    }

    .link-columns-wrapper {
      display: grid;
      grid-template-columns: repeat(4, 1fr);
      gap: 20px;
      margin-bottom: 0px;
    }

    .link-list-column h3 {
      margin: 0 0 10px;
      font-size: 1rem;
      font-weight: 500;
    }

    .link-list-column ul {
      list-style: none;
      padding: 0;
    }

    .link-list-column li a {
      display: block;
      padding: 10px 12px;
      margin-bottom: 8px;
      background-color: transparent;
      color: var(--text-primary);
      text-decoration: none;
      border-radius: var(--border-radius);
      transition: background-color 0.2s ease, color 0.2s ease, border 0.2s ease;
      font-size: 1.05rem;
      font-weight: 400;
      text-align: left;
      border: 1px solid #3a3c3f;
    }

    .link-list-column li a:hover {
      background-color: transparent;
      color: #abb2ba;
      border: 1px solid #abb2ba;
    }

    .password-controls {
      display: flex;
      gap: 10px;
    }

    .password-controls input[type="number"] {
      width: 70px;
      background-color: var(--bg-main);
      color: var(--text-primary);
      border: 1px solid var(--border-subtle);
      border-radius: var(--border-radius);
      padding: 10px;
      font-family: var(--font-mono);
      font-size: 1.0625rem;
    }

    .password-controls input[type="text"] {
      flex-grow: 1;
      min-width: 300px;
      overflow-x: auto;
      background-color: var(--bg-main);
      color: var(--text-primary);
      border: 1px solid var(--border-subtle);
      border-radius: var(--border-radius);
      padding: 10px;
      font-family: var(--font-mono);
      font-size: 1.0625rem;
    }

    .password-controls button {
      background-color: transparent;
      color: #abb2ba;
      border: 1px solid #525563;
      border-radius: var(--border-radius);
      padding: 10px 32px;
      cursor: pointer;
      font-size: 1.0625rem;
      transition: background-color 0.2s ease, color 0.2s ease;
    }

    .password-controls button:hover {
      background-color: #abb2ba;
      color: #000;
    }

    code {background-color: #111315; padding: 4px 8px;}
  </style>
</head>
<body>
  <div class="dashboard-container">
    <!-- 🔗 Quick Access Links -->
    <section id="link-organizer">
      <h1 class="main-title">My Links</h1>
      <div class="link-columns-wrapper">
        <div class="link-list-column">
          <h3>Tools</h3>
          <ul>
            <li><a href="https://pagespeed.web.dev/">PageSpeed</a></li>
            <li><a href="https://search.google.com/search-console/about">Search Console</a></li>
          </ul>
        </div>
        <div class="link-list-column">
          <h3>Websites</h3>
          <ul>
            <li><a href="https://beginnerprojects.com/">beginnerprojects.com</a></li>
            <li><a href="https://duckduckgo.com">duckduckgo.com</a></li>
          </ul>
        </div>
        <div class="link-list-column">
          <h3>Supplemental Sites</h3>
          <ul>
            <li><a href="https://lxer.com/">lxer.com</a></li>
            <li><a href="https://www.youtube.com">youtube.com</a></li>
          </ul>
        </div>
        <div class="link-list-column">
          <h3>AI</h3>
          <ul>
            <li><a href="https://chatgpt.com">chatgpt.com</a></li>
            <li><a href="https://www.perplexity.ai/">perplexity.ai</a></li>
          </ul>
        </div>
      </div>
    </section>

    <div class="section-spacer"></div>

    <!-- 🔐 Password Generator -->
    <section id="password-generator-section">
      <h2>Password Generator</h2>
      <div class="password-controls">
        <input id="password-length" type="number" min="8" max="60" value="36" />
        <button onclick="generateAndDisplayPassword()">Generate</button>
        <input id="password-output" type="text" readonly />
        <button onclick="copyPasswordToClipboard()">Copy</button>
      </div>
    </section>

    <footer>
      <p>Today is <span id="footer-date"></span></p>
    </footer>
  </div>

  <script>
    document.addEventListener("DOMContentLoaded", () => {
      const today = new Date();
      const dateSpan = document.getElementById("footer-date");
      if (dateSpan) {
        dateSpan.textContent = today.toLocaleDateString(undefined, {
          weekday: "short",
          year: "numeric",
          month: "short",
          day: "numeric"
        });
      }
    });

    function generateAndDisplayPassword() {
      const len = Math.max(8, Math.min(60, parseInt(document.getElementById("password-length").value) || 24));
      const chars = "ABCDEFGHJKLMNPQRSTUVWXYZabcdefghijkmnopqrstuvwxyz0123456789!@#$%^&*()_+-=~`[]{}:;,.<>?";
      let result = "";
      while (result.length < len) {
        const c = chars[Math.floor(Math.random() * chars.length)];
        if (!"/\\<>|".includes(c)) result += c;
      }
      document.getElementById("password-output").value = result;
    }

    async function copyPasswordToClipboard() {
      const result = document.getElementById("password-output").value;
      if (result) await navigator.clipboard.writeText(result);
    }
  </script>
</body>
</html>
Make it Your Own
The beauty of this dashboard is that it is entirely yours. I encourage you to dive into the code and experiment! You can add dozens of new buttons, create new categories, or even change the colors to match your favorite theme. Don’t be afraid to break things—that is the best way to learn how HTML and CSS work. If you accidentally delete a bracket or mess up the layout, no worries; you can always come back to this post and grab a fresh copy of the starter file.
Pro Tip: I’ve edited the Brave browser settings to load this page every time I press the “home” button.